|
数据搜索系统,热门电子元器件搜索 |
|
|
数据搜索系统,热门电子元器件搜索 |
|
HS1L-R7Y4KMSRM-R 数据表(PDF) 6 Page - IDEC Corporation |
|
|
|||||||||||||||||||||||||||||
HS1L-R7Y4KMSRM-R 数据表(HTML) 6 Page - IDEC Corporation |
|
|
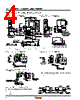
6 / 8 page  6 HS1L Interlock Switches with Solenoid Safety Precautions ! Inordertoavoidelectricshockorfire,turnpoweroffbefore • installation, removal, wiring, maintenance, or inspection of the interlock switch. If relays are used in the circuit between the interlock switch • and the load, consider the danger, and use safety relays, since welded or sticking contacts of standard relays may in- validate the functions of the interlock switch. Perform a risk assessmentandestablishasafetycircuitwhichsatisfiesthe requirement of the safety category. Do not place a PLC in the circuit between the interlock switch • and the load. Safety security can be endangered in the event of a malfunction of the PLC. Do not disassemble or modify the interlock switch, otherwise • the switch may fail or an accident may occur. Do not install the actuator in a location where someone may • come in contact with it as injury may occur. Install the actuator where it does not touch anyone when the • door is opened/closed as injury may occur. The solenoid lock type is locked when energized, and un- • locked when de-energized. When energization is interrupted due to wire disconnection or other failures, the interlock switch may be unlocked causing possible danger to the operators. Solenoid lock type must not be used in applications where locking is required for safety. Perform a risk assessment and determine whether a solenoid lock type is appropriate. In order to prevent the interlock switch and actuator from be- • ing removed without authorization, it is recommended to in- stall an one-way screw or a screw that needs a special tool for removal. Welding or rivets are also recommended. Instructions Regardless of door types, do not use the interlock switch as • a door stop. Install a mechanical door stop at the end of the door to protect the interlock switch from excessive force. Make sure that no force is applied on the actuator, otherwise • the actuator may not unlock properly. Do not apply excessive shock to the interlock switch when • opening or closing the door. A shock to the interlock switch ex- ceeding 1,000m/s2 may cause damage to the interlock switch. If the operating atmosphere is contaminated, use a protective • cover to prevent the entry of foreign objects into the interlock switch through the actuator entry slots. Entry of foreign ob- jects into the interlock switch may affect the mechanism of the interlock switch and cause it to fail. Plug the unused actuator entry slot using the slot plug sup- • plied with the interlock switch. Do not store the interlock switches in a dusty, humid, or or- • ganic-gas atmosphere, or where the switches are exposed to direct sunlight. Use proprietary actuators only. The interlock switch may be • damaged if other actuators are used, . The actuator retention force is 3000N. Do not apply a load • higher than the rated value. When a higher load is expected, provide an additional system consisting of another interlock switch without lock (such as the HS5D interlock switch) or a sensor to detect door opening and stop the machine. Regardless of the door, do not use the interlock switch as a • door lock. Install a separate lock using a latch or other device. While the solenoid is energized, the interlock switch tempera- • ture rises approximately 40°C above the ambient tempera- ture (to approximately 95°C while the ambient temperature is 55°C). To prevent burns, do not touch. If cables might come into contact with the interlock switch, use heat-resistant ca- bles. The interlock switch solenoid has polarity. Be sure of the cor- • rect polarity when wiring. Minimum Radius of Hinged Door When using the interlock switch for a hinged door, refer to the minimum radius of doors as shown below. For doors with a small minimum radius, use actuators with adjustable angle (HS9Z-A3S). Note: The following values apply when the actuator does not interfere with the interlock switch when opening and closing the door. Because de- viation or dislocation of hinged door may occur in actual applications, make sure of the correct operation before installation. When using HS9Z-A2S Actuator When the door hinge is on the extension line of the interlock • switch surface: Door Hinge Door Hinge When the door hinge is on the extension line of the actuator • mounting surface: Door Hinge Door Hinge When using HS9Z-A3S Actuator When the door hinge is on the extension line of the interlock • switch surface: 50mm When the door hinge is on the extension line of the actuator • mounting surface: 80mm 80 mm 50 mm Door Hinge Minimum Radius Minimum Radius Door Hinge Actuator Angle Adjustment Using the angle adjustment screw, the actuator angle can • be adjusted (refer to the dimensional drawing on page 4). Adjustable angle: 0 to 20° The larger the adjusted angle of the actuator, the smaller the • applicable radius of the door opening. After installing the actu- ator, open the door. Then adjust the actuator so that its edge can be inserted properly into the actuator entry slot of the in- terlock switch. After adjusting the actuator angle, apply Loctite to the adjust- • ment screw so that the screw will not move. |
|
|
链接网址 |
| ALLDATASHEET是否为您带来帮助? [ DONATE ] |
关于 Alldatasheet | 广告服务 | 联系我们 | 隐私政策 | 数据表链接 | 链接交换 | 制造商名单 All Rights Reserved©Alldatasheet.com |
| Russian : Alldatasheetru.com | Korean : Alldatasheet.co.kr | Spanish : Alldatasheet.es | French : Alldatasheet.fr | Italian : Alldatasheetit.com Portuguese : Alldatasheetpt.com | Polish : Alldatasheet.pl | Vietnamese : Alldatasheet.vn Indian : Alldatasheet.in | Mexican : Alldatasheet.com.mx | British : Alldatasheet.co.uk | New Zealand : Alldatasheet.co.nz |
|
Family Site : ic2ic.com |
icmetro.com |
 Chinese ▼
 English
 Chinese
 German
 Japanese
 Russian
 Korean
 Spanish
 French
 Italian
 Portuguese
 Polish
 Vietnamese
 Indian
 Mexican
 British
 New Zealand