|
数据搜索系统,热门电子元器件搜索 |
|
|
数据搜索系统,热门电子元器件搜索 |
|
KW2D-R100Q4E. 数据表(PDF) 14 Page - IDEC Corporation |
|
|
|||||||||||||||||||||||||||||
KW2D-R100Q4E. 数据表(HTML) 14 Page - IDEC Corporation |
|
|
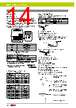
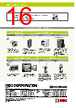
14 / 16 page  KW2D Series ø22 Smart RFID Reader 14 Instructions Applicable Wire Power Supply Wiring • The KW2D Series RFID Reader has a push-in style terminal block. • An inrush current of 25A or lower (when input is 24V DC) flows when the power is turned on. Use a power supply with sufficient capacity. • To prevent induction, keep the power line as short as possible, and as far away as possible from motor lines. • The following table shows the signals that correspond to the signal codes. Be careful not to mistake the connections. Label/Symbol Signal Wire 24V Power supply (+24V) 0V Power supply (0V) Functional ground (FE) When wiring, use the applicable wires shown below. Applicable Wire and Specifications Applicable Wire 0.25 to 1.5mm2 (AWG16 to 24) Wire Strip Length (*1) 8 ± 1mm (*2) Ferrule Size (*1) H0.5 to H1.5 (without insulated cover) H0.25 to H0.75 (with insulated cover) *1 For details on ferrules, see the “Wire Size and Recommended Ferrules” table below. *2 Strip the sheath of the wire 8±1mm from the end. Note: Make sure that the stranded wires do not loosen when using wiring without ferrules. - + 24V DC external power supply 24V DC power input +24V 0V FE Bottom of pack unit 8±1mm Wire Size and Recommended Ferrules Ferrules without insulated covers Applicable Wire (Stranded Wire) Wire Strip Length Weidmüller Recommended Part No. AWG mm2 20 0.50 10 to 11mm H0.5/10 18 0.75 10 to 11mm H0.75/10 17 1.00 10 to 11mm H1.0/10 16 1.50 10 to 11mm H1.5/10 Ferrules with insulated covers Applicable Wire (Stranded Wire) Wire Strip Length Weidmüller Recommended Part No. AWG mm2 24 0.25 10 to 11mm H0.25/12 HBL 22 0.34 10 to 11mm H0.34/12 TK 20 0.50 10 to 11mm H0.5/14 OR 20 0.50 10 to 11mm H0.5/14S OR 20 0.50 10 to 11mm H0.5/14S W 18 0.75 10 to 11mm H0.75/14 W *1 UL wire compatible with insulated cover Recommended Tools (Optional) The following recommended tools can be used. The recommended tools are manufactured by Weidmüller. Name Weidmüller Recommended Part No. Flat blade screwdriver Normal type SDS 0.4 × 2.5 × 75 With insulated cover SDS 0.4 × 2.5 × 75 Crimping tool PZ6/5 0.4mm 2mm Crimping of Ferrules and Wiring • Choose an appropriate ferrule for the wire. • Cut the wire carefully to get a flat end. • Make sure that ferrule sleeve is completely filled by the conductor. Depending on the cross section, the conductor should protrude approx. 0 to 1mm from the ferrule sleeve. 0~1mm • When crimping, refer to the instructions of the crimping tool. Max. 1.48mm Max. 2.1mm Faults which can occur during crimping: • Cracks along the sides and die impressions • Splitting of the ferrules • Asymmetrical crimping shape • Extreme burrs formed along the sides • Ferrule not filled by conductor • Single conductors pushed back by protruding from the insulated cover • Single conductors squeezed off • Insulation cover damaged by the crimping jaw • Conductor insulation not pushed into the insulated cover • Ferrule bent longitudinally after crimping Single conductor squeezed off Single conductor protruding Asymmetrical crimping shape, burr formation on one side Asymmetrical crimping shape, burr formation on one side Formation of cracks at the impressions of the crimping jaw Formation of cracks at the sides, sides split open |
|
|
链接网址 |
| ALLDATASHEET是否为您带来帮助? [ DONATE ] |
关于 Alldatasheet | 广告服务 | 联系我们 | 隐私政策 | 数据表链接 | 链接交换 | 制造商名单 All Rights Reserved©Alldatasheet.com |
| Russian : Alldatasheetru.com | Korean : Alldatasheet.co.kr | Spanish : Alldatasheet.es | French : Alldatasheet.fr | Italian : Alldatasheetit.com Portuguese : Alldatasheetpt.com | Polish : Alldatasheet.pl | Vietnamese : Alldatasheet.vn Indian : Alldatasheet.in | Mexican : Alldatasheet.com.mx | British : Alldatasheet.co.uk | New Zealand : Alldatasheet.co.nz |
|
Family Site : ic2ic.com |
icmetro.com |
 Chinese ▼
 English
 Chinese
 German
 Japanese
 Russian
 Korean
 Spanish
 French
 Italian
 Portuguese
 Polish
 Vietnamese
 Indian
 Mexican
 British
 New Zealand