|
数据搜索系统,热门电子元器件搜索 |
|
|
数据搜索系统,热门电子元器件搜索 |
|
FT-R80 数据表(PDF) 13 Page - List of Unclassifed Manufacturers |
|
|
|||||||||||||||||||||||||||||
FT-R80 数据表(HTML) 13 Page - List of Unclassifed Manufacturers |
|
|
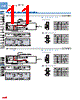
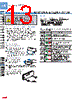
13 / 16 page  135 DigitalFiberSensorFX-100SERIES FIBER SENSORS LASER SENSORS PHOTO- ELECTRIC SENSORS MICRO PHOTO- ELECTRIC SENSORS AREA SENSORS SAFETY COMPONENTS PRESSURE SENSORS INDUCTIVE PROXIMITY SENSORS PARTICULAR USE SENSORS SENSOR OPTIONS WIRE- SAVING SYSTEMS MEASURE- MENT SENSORS STATIC CONTROL DEVICES LASER MARKERS Selection Guide Fiber Sensor Amplifiers FX-300 FX-100 Fibers FT / FD / FR FX-410 FX-311 FX-11A FX-301-F Other Products FIBER SENSORS FX-100 Fiber sensor Ampilifiers PRECAUTIONS FOR PROPER USE Refer to p.986~ for general precautions, and to the “Operation Guide” or “SUNX website” (http://www.sunx.com) for details pertaining to operating instructions for the amplifier. Never use this product as a sensing device for personnel protection. In case of using sensing devices for personnel protection, use products which meet laws and standards, such as OSHA, ANSI or IEC etc., for personnel protection applicable in each region or country. • • The FX-100 series does not use the horizontal connectors that are used with the FX-300 / FX-400 series. Please note that horizontal connection cannot be performed using a connector attached cable. In addition, the optical communication function is not equipped on the FX-100 series, so it is unable to perform interference prevention for use with the FX-300 / FX-400 series. If using the FX-100 series together with the FX-300 / FX-400 series side-by-side, please set the same models together in groups. • Using in combination with the FX-300 / FX-400 series Mounting <When using a DIN rail> How to mount the amplifier 1 Fit the rear part of the mounting section of the amplifier on a 35 mm 1.378 in width DIN rail. 2 Press down the rear part of the mounting section of the unit on the 35 mm 1.378 in width DIN rail and fit the front part of the mounting section to the DIN rail. Part description Setting mode Setting mode appears after the MODE key is pressed for 2 sec. in RUN mode. • Setting item Factory setting Description Teaching mode Threshold value can be set in 2-level teaching, limit teaching, or full-auto teaching. Output operation setting [Dark-ON] Light-ON or Dark-ON can be set. Timer operation setting [Without timer] Without timer, ON delay timer, or OFF delay timer can be set. Timer setting [ON-delay timer: 10 ms] [OFF-delay timer: 10 ms] In case of setting ON-delay timer or OFF-delay timer in the timer operation setting mode, timer can be set. When timer is not set, this mode is not displayed. Emission amount setting [OFF] Setting for reduced intensity of emission amount is possible when the incident light intensity is saturated. Emission frequency setting FX-101□ 0 (Response time: 250 μs or less) FX-102□ 1 (Response time: 2.5 ms or less) In case of using the fiber heads in parallel, interference can be prevented by setting different emission frequency. However, when emission frequency 0 is set, interference cannot be prevented. Response time corresponds to emission frequency. For details, refer to “SPECIFICATIONS” on p.132. Operation indicator (Orange) MODE key ON key / Setting value UP key OFF key / Setting value DOWN key Digital display (Green) (Threshold value) Digital display (Red) (Incident light intensity) 35 mm 1.378 in width DIN rail 1 2 How to remove the amplifier 1 Push the amplifier forward. 2 Lift up the front part of the amplifier to remove it. Note: Take care that if the front part is lifted without pushing the amplifier forward, the hook on the rear portion of the mounting section is likely to break. <When using screws with washers> Use M3 screws with washers for mounting. The tightening torque should be 0.5 N·m or less. • 1 2 M3 screw with washer |
|
|
链接网址 |
| ALLDATASHEET是否为您带来帮助? [ DONATE ] |
关于 Alldatasheet | 广告服务 | 联系我们 | 隐私政策 | 数据表链接 | 链接交换 | 制造商名单 All Rights Reserved©Alldatasheet.com |
| Russian : Alldatasheetru.com | Korean : Alldatasheet.co.kr | Spanish : Alldatasheet.es | French : Alldatasheet.fr | Italian : Alldatasheetit.com Portuguese : Alldatasheetpt.com | Polish : Alldatasheet.pl | Vietnamese : Alldatasheet.vn Indian : Alldatasheet.in | Mexican : Alldatasheet.com.mx | British : Alldatasheet.co.uk | New Zealand : Alldatasheet.co.nz |
|
Family Site : ic2ic.com |
icmetro.com |
 Chinese ▼
 English
 Chinese
 German
 Japanese
 Russian
 Korean
 Spanish
 French
 Italian
 Portuguese
 Polish
 Vietnamese
 Indian
 Mexican
 British
 New Zealand