|
数据搜索系统,热门电子元器件搜索 |
|
|
数据搜索系统,热门电子元器件搜索 |
|
300-R010-45G 数据表(PDF) 23 Page - Magnetrol International, Inc. |
|
|
|||||||||||||||||||||||||||||
300-R010-45G 数据表(HTML) 23 Page - Magnetrol International, Inc. |
|
|
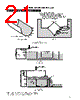
23 / 36 page  SOFTWARE CONFIGURATION cont. 23 Any of the relays can be configured as alarm relays. Each alarm relay can be configured to be controlled by Level, Volume (when in Volume & Level mode), or Flow (when in the Flow & Level mode). The alarm relays can be configured to have the same on and off points, or different on and off points. Alarm Relay Configuration I/O Configuration Menu (Alarm Relay Setting) Display Keystroke Comment and/or Additional Keystrokes I/O Config Press ENT Enters the Relay Settings menu. to select Relay Settings Press ENT Allows entry into the Select Relay submenu. to select Select Relay Press ENT Allows configuration of relay. to select Select Relay Press ENT or Press ENT to begin configuring relay #1 (if it was not used as a Fault relay) or 1 2, 3, or 4 enter 2, 3, or 4 to configure the other relays. Fault Relay (#1) Press Fault Relay (#1) will be displayed only if you are configuring relay #1. Press Disable to keep it disabled as a fault relay, and proceed to configure it as an alarm relay. Enable/Disable Press ENT Enables the relay. After enabling the relay press ENT again to move the back Disable and up to the top line, and then press to proceed to the next item. Controlled By Press ENT If the unit is in the Level Only mode, this screen will not be shown. If the unit is Level or in the Volume & Level, or Flow & Level modes, the relay can be used to control level, volume or flow. Pressing will set the relay to be controlled by level. Press ENT, , ENT, and if controlling by volume or flow if desired. Relay On Point Press ENT Inserts a on the bottom line of the LCD which allows the value to be changed. xxxx units Enter the value for the on point and then press ENT and . Relay Off Point Press ENT Inserts a on the bottom line of the LCD which allows the value to be changed. xxxx units Enter the value for the off point and then press ENT and . Relay Action Press ENT This screen will only appear if the “Relay On” and “Relay Off” points are the DNRG < Setpoint or same. Select either “DNRG<Setpoint” to have the relay de-energize at a value that is less than the set point (low level fail-safe), or “DNRG>Setpoint” to have the relay de-energize at a value that is greater than the set point (high level fail- safe). Relay On Delay Press ENT A one-second delay on the relay is preset from the factory to prevent relay 1 sec or chattering during turbulent process conditions. Press to keep this at one second, or press ENT to enter a different (0-255 seconds) value. Relay Off Delay Press ENT Press to keep this at one second, or press ENT to enter a different (0-255 1 sec or seconds) value. Fault Mode Press ENT If the unit detects one of the six fault conditions described in Fault Relay OFF on FAULT or Configuration (page 22), the alarm relays can either be configured to turn OFF (de-energize) or to HOLD their current state. The factory default setting is OFF. Previous Menu Press ENT Reverts back to the Select Relay submenu. to select As shown in the General Programming Menu on page 14, all four relays can be included in a lead-lag group for pump con- trol. The factory default setting is OFF for the lead-lag mode. To set-up relays in a lead-lag group, the lead-lag mode must be changed to one of the following five selections: 1-2, 1-2- 3, 1-2-3-4, 2-3, or 2-3-4. If relay #1 is configured as a fault relay (page 22), then 2-3 and 2-3-4 are the only two possible relay groupings for lead-lag control of pumps. If relay #1 is not configured as a fault relay, then the lead-lag group selec- tions are 1-2, 1-2-3, or 1-2-3-4. When configuring the lead-lag mode you will see the follow- ing warning message: No Alarm Relays in LeadLag Group. This message means that any relays that are included in the lead-lag group must have different on and off points. The software does not allow any individual relays in the lead-lag group to have the same on and off points. See Figure 16 on the next page for further explanation. Lead-Lag Relays I/O CONFIGURATION MENU cont. |
|
链接网址 |
| ALLDATASHEET是否为您带来帮助? [ DONATE ] |
关于 Alldatasheet | 广告服务 | 联系我们 | 隐私政策 | 数据表链接 | 链接交换 | 制造商名单 All Rights Reserved©Alldatasheet.com |
| Russian : Alldatasheetru.com | Korean : Alldatasheet.co.kr | Spanish : Alldatasheet.es | French : Alldatasheet.fr | Italian : Alldatasheetit.com Portuguese : Alldatasheetpt.com | Polish : Alldatasheet.pl | Vietnamese : Alldatasheet.vn Indian : Alldatasheet.in | Mexican : Alldatasheet.com.mx | British : Alldatasheet.co.uk | New Zealand : Alldatasheet.co.nz |
|
Family Site : ic2ic.com |
icmetro.com |
 Chinese ▼
 English
 Chinese
 German
 Japanese
 Russian
 Korean
 Spanish
 French
 Italian
 Portuguese
 Polish
 Vietnamese
 Indian
 Mexican
 British
 New Zealand